Link Notud + Xero in 3 steps
.png)
.png?width=200&height=67&name=Contacts%20(2).png)
.png)
Step 1: Login to Xero through Notud
Go to the login page at: https://app.notud.com/
Select 'Login with Xero'.
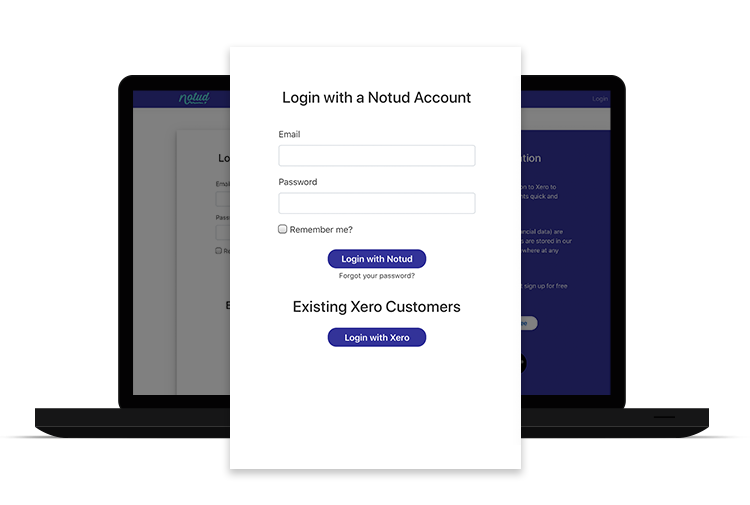
Enter your Xero login details.
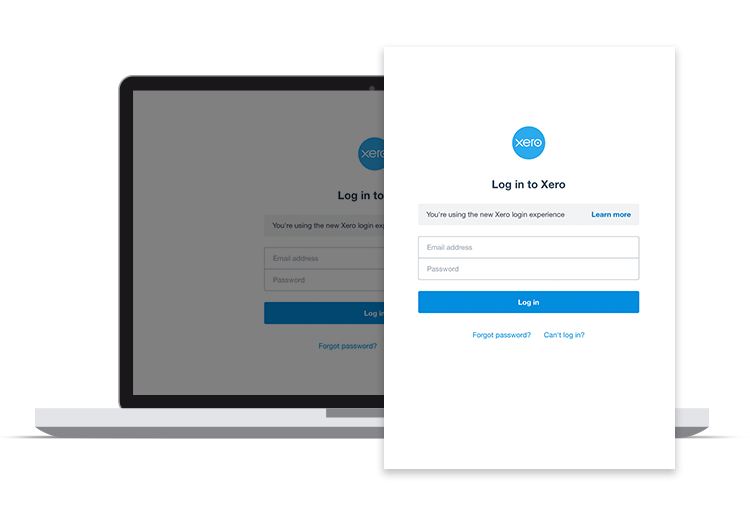
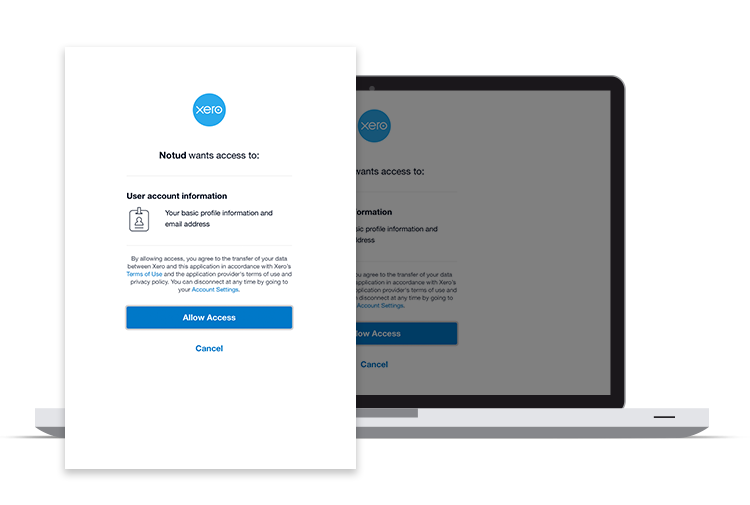
Step 2: Allow access to your Xero Contacts
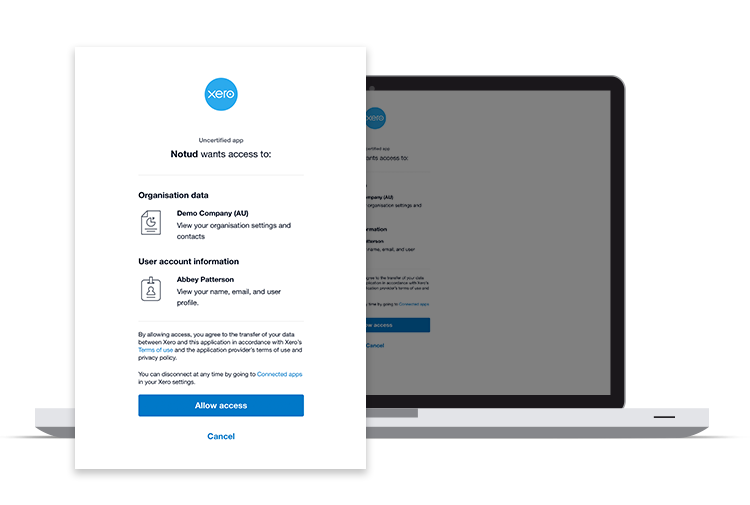
Click 'Allow access' when prompted by Xero. There will be two notifications, one is for User account information, and the other is for Organisation data and User account information.
PLEASE NOTE, Notud will not be able to access any financial data.
Step 3: Link Contacts
Click 'Xero Custom Contact Links'.
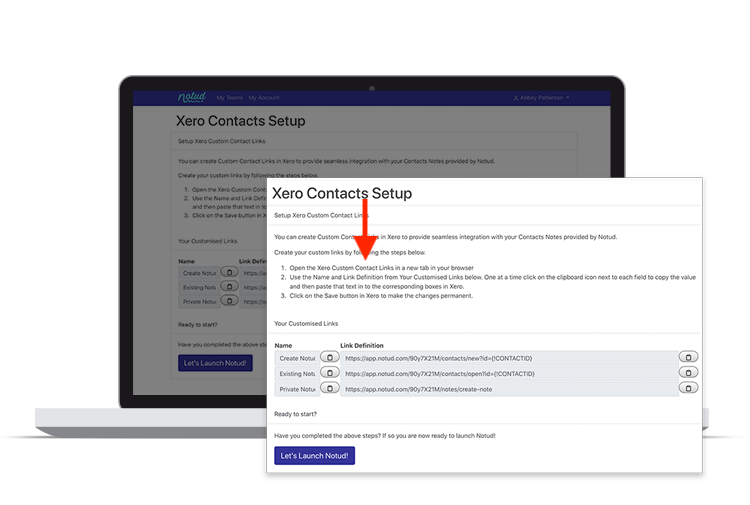
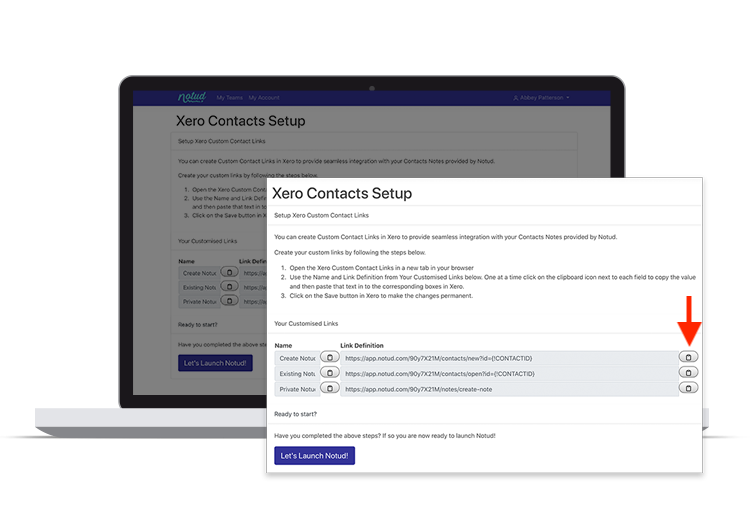
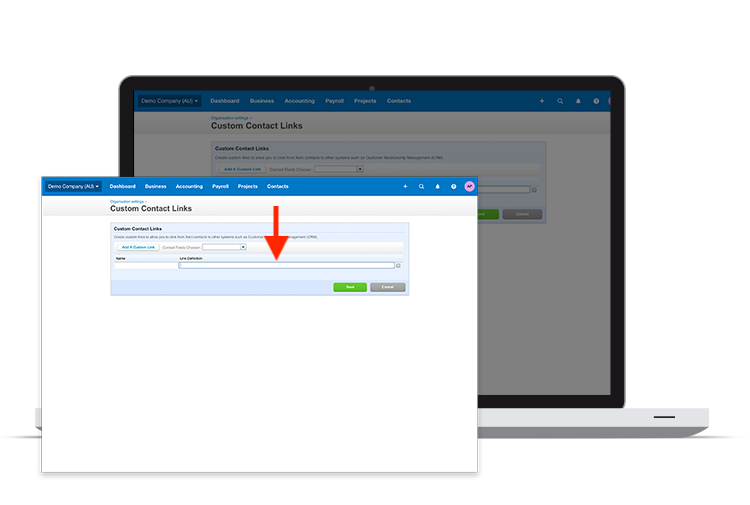
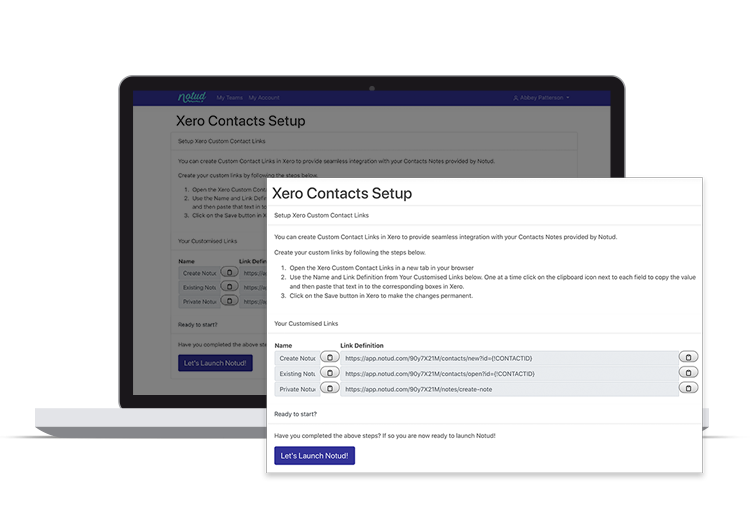
You will see a page open in a new tab that looks like this. Click 'Add a Custom Link'.
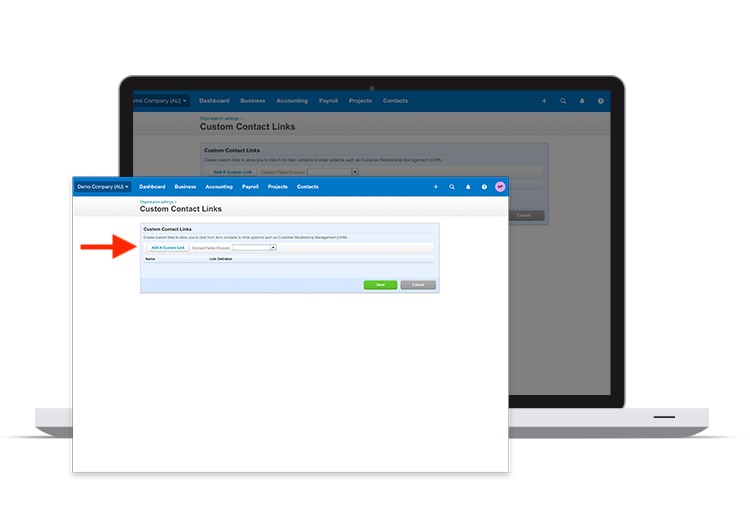
Go back to the 'Xero Contacts Setup' page and click on the clipboard next to 'Create Notud' to copy the text.
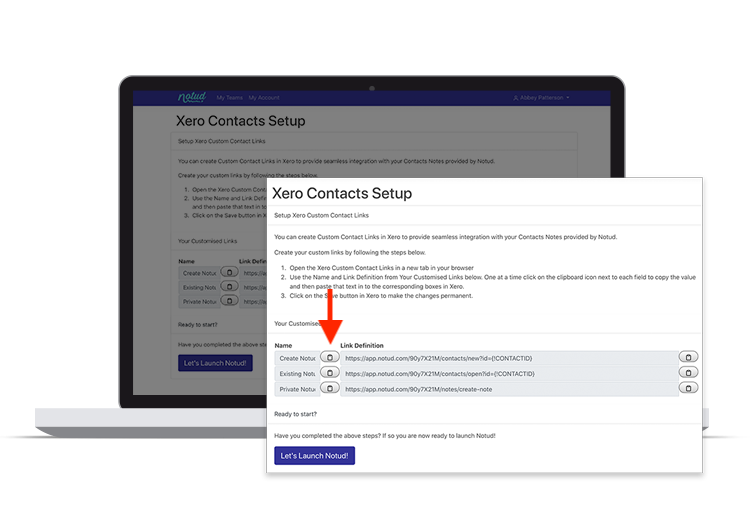
On the Xero Custom Contact Links page, paste the copied text in to the column 'Name'.
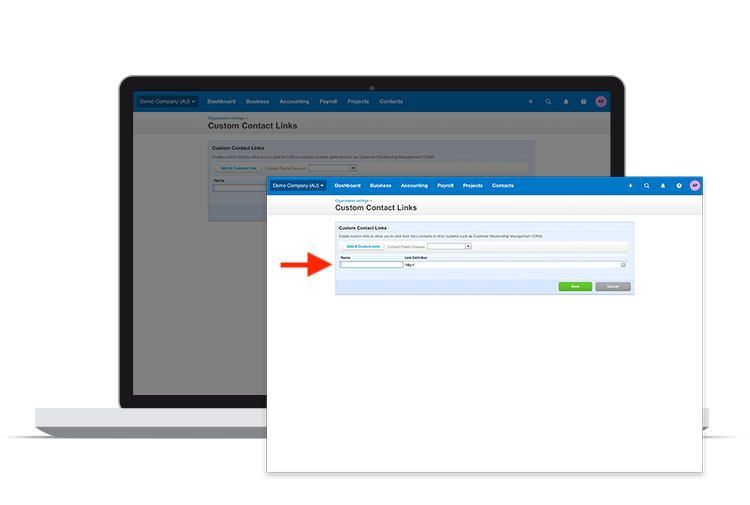
On the 'Xero Contacts Setup' page, click on the clipboard next to top URL to copy the URL.
On the Xero Custom Contact Links page, paste the copied text in to the column 'Link Definition'.
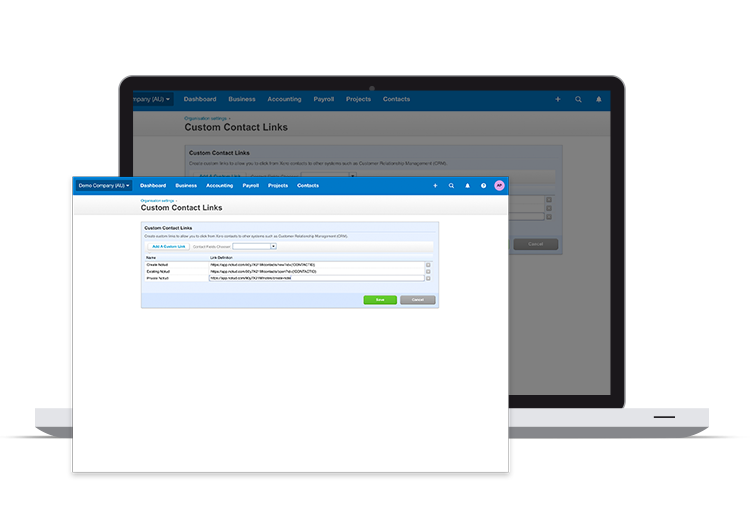
Repeat this for each different row. Your page should now look like this with custom text in each field.
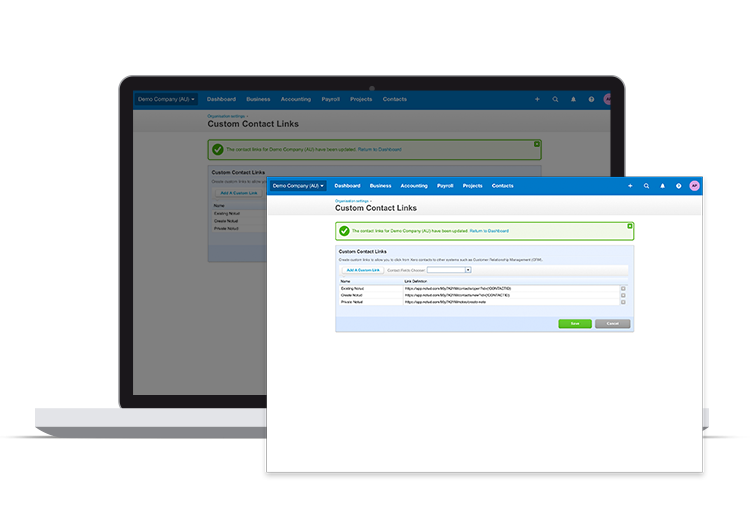
Click Save and you can now return to your Xero dashboard.
Start using!
Start using Notud by going to the 'Xero Contacts Setup' page you have open and click 'Let's Launch Notud!'. You will see all of your Contacts from Xero are now in here and you can start note-taking for clients, or general note taking by clicking 'Private Note'.
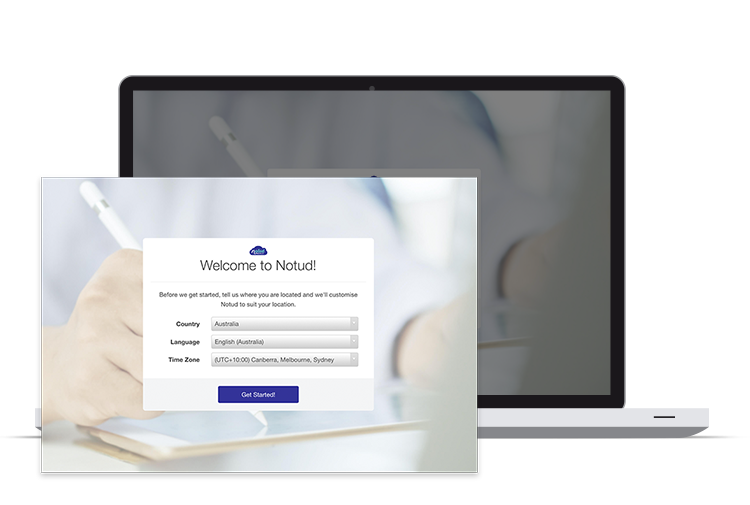
PLEASE NOTE, when you click Get Started! Notud may take a minute or two to load if you have a large number of Contacts, thanks for your patience while your Contacts are being synced.
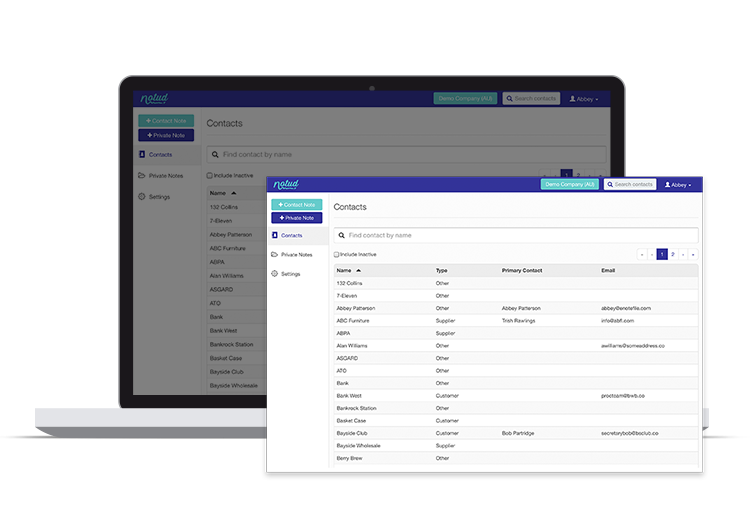
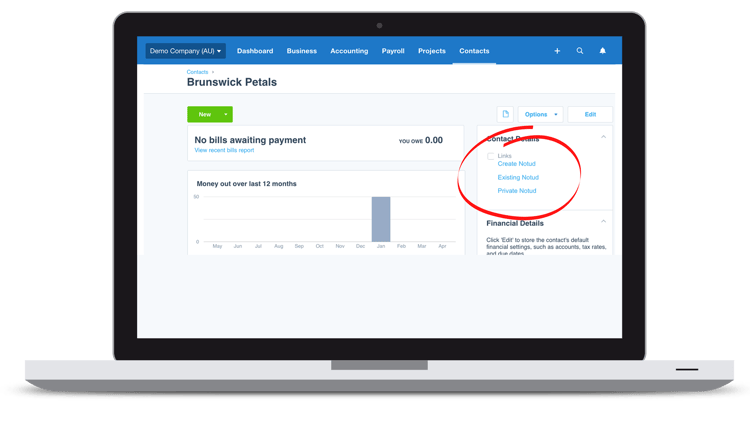
You can also access Notud from Xero by viewing one of your Contacts. On the right hand side of the individual Contact screen you will see you can create a note, view and edit an existing note, or create a private note.
Happy note taking!


